Introduction
Have you ever stopped to wonder what you would have done to turn those dried chilis into sauce or how you would have made your favorite Milkshakes and Smoothies if you did not have a blender to grind these items out? We may never realize how lucky to have this disruptive technology until we take a reflection. To put this into a more relatable perspective, people in the older generations used the likes of mortals, pestles, and stones for their grinding; that must have been inconvenient!. A Blender indeed would be a dream come true, especially for those who have had to experience the hardship of the older generations. A blender can chop, puree and blend in a matter of seconds.
As far as small kitchen appliances go, the blender is a newer invention than most. In 1922, a man named Stephen Poplawski decided to place a spinning blade at the bottom of a tall container. He used his new invention to make soda fountains. Shortly after this period, Fred Osius followed suit and introduced some changes to this monumental invention. Hence, he invented the Waring blender in the year 1933. A few years ago, Barnard, the founder of Vitamix, also remodeled and created the Vitamix Blender.
About Vitamix
Vita-Mix Corporation is a privately owned American company managed by the Barnard family, they are majorly into the manufacturing of blenders, and they carry on business under the brand name Vitamix. The Vitamix company was founded in the year 1921 and has since this year been privately managed by the Barnard family. Vitamix originally did not manufacture blenders. Blender manufacturing did not begin until 1937, when Barnard noticed a blender at a trade show, assessed it, and created his variations with more vitality and durability. Hence, the name Vitamix.
The Vitamix blender, the Vitamix 3600, was first launched in 1969. This was the first blender that could make hot soup, blend ice cream, grind grain, and knead bread dough. This is a lot of development from conventional Blenders of time. It was indeed a lot of Vitality quality added. Worthy of mention is that, before 1969, Bill Barnard inherited the business from his father and officially changed the name to Vita-Mix Corporation in 1964. Vitamix blenders have been based in Olmsted Township, Ohio, since 1948, and it has since then undertaken several community development programs in Ohio. Notable amongst these community development programs is the employment of at least 700 people, most at its Northeast Ohio headquarters and manufacturing facilities.
Tips for using a Vitamix Blender.
If you are already wondering , what are the best ways to clean my blender, the sectioons below will provide a guide to that but before we go to that, it is important that you learn first and foremost, how to use your Vitamix blender effectively, so as to avoid other faults that could occur as a result of wrong usage.
Don’t Hesitate. Blend on high.
In very simple terms, always start your blending process from low but turn that dial-up shortly after high. Often, we think our Vitamix blender may be damaged from the noise it makes when it works on high. In the same vein, we are afraid that the noise may wake a sleeping Dog or disturb neighbors, but it is important to know that this noise will only take a short while. When you run your Vitamix at low speed, you are hurting the machine, and you expose it to the possibility of irreparable damage.
When your blender runs low, its content will blend very slowly, taking more time and probably causing overheating. However, when you ramp the blender up to the highest speed, it only takes a little while for blending to be completed, and they may never be a need to trigger the Automatic Overload Protection mechanism or, worse still, cause the overload fuse to blow up.
No need for any apprehension of damage to the blender because this situation has been envisaged by the Manufacturer. Hence, the blender works so that the cooling fan is maximized when it is on full throttle, supplying the motor with enough wind to stay cool but remember, it is important to start on low.
Load the Blender Container properly
The order in which you load your recipe will determine whether you get a smooth blending experience or not. It is more important than you might realize because this can also determine the longevity of your Vitamix blender.
For the proper arrangement of your recipe in your blender container, always load liquids closest to the blades, follow liquid items with soft items and then hard and frozen ones. The liquids on the bottom prevent air pockets from forming around the blades. And the weight of the frozen items on top helps push the other ingredients into the blades for a seamless blend, which also prevents the blend from stalling the blades from ceasing.
Note: Below is the order of arrangement for the 48oz and 64oz containers:
- Liquids (water, juice, milk, yogurt)
- Dry Goods (grains, seasonings, powders)
- Leafy Greens
- Fruits & Veggies
- Ice & Frozen Ingredients
However, if your container is the 20oz personal container or the 80z blending bowls, as you may find it in the Vitamix 5300 Blender, Professional-Grade, remember to reverse this order because you flip the container upside down on top of your Vitamix.
Make sure to add the right quantity.
You should never overfill or add too little content to your container when blending. When the content is too much, your blender risks stopping or leaking through the lid. Too much load will put excessive pressure on the blades and sometimes make it cease. On the other hand, when you blend too little, the blades will simply spatter the content to the walls of the container without actually giving it that smooth effect. Hence, you need at least 3 cups of ingredients which a narrow container requires, vs. 4.5 cups for a wide jar.
Ensure to keep an eye on the maximum fill line on the container to avoid the container leaking from the top.
Use the Tamper as often as possible.
A tamper is a blender accessory that you can use to get the ingredients in the container moving. When the container’s content moves around the blades, it helps the blade spin at maximum speed, making grinding much more effective. The tamper is usually used when blending thick items like frozen yogurt and nut butter for proper tuning.
When using the tamper, remember to never fill your container more than two-thirds of the way full, and make sure that the tamper never comes in contact with the blades. The best way to use the tamper is to press the tamper down toward the four corners of the container until your recipe blends smoothly again.
Cleaning Your Container
Some blended particles may be lurking in the container after use. Hence, to stay healthy and encourage the proper functioning of your blender, it is important to clean the container. Cleaning your Vitamix container is not a difficult task. It is as simple as filling it halfway with warm water and dish soap, then running it on a high blend for at least 30 seconds. However, if you have a cleaning cycle on your blender, you can just hit the button to run a quick cleanse.
Another issue to look out for is a cloudy container. You may notice a white film that causes the container to appear cloudy and make you wonder if your container is clean. This is no cause for panic as your Vitamix container can develop this white film if it is frequently used to blend mineral-rich fruits and vegetables. This cloudy appearance can be so tricky that even vigorous scrubbing won’t get it off in many cases.
The best way to prevent this is to run a thorough cleaning. Below are a few quick tips for cleaning a cloudy container. More details will be provided in subsequent sections.
Here’s how you can get rid of that cloudy look on the container:
- Pour one cup of white vinegar into the container.
- Fill the contain half-full with warm water.
- Let the container soak in an upright, standing position for several hours.
- Pour the contents and use a soft pot scrubber to clean the remaining residue.
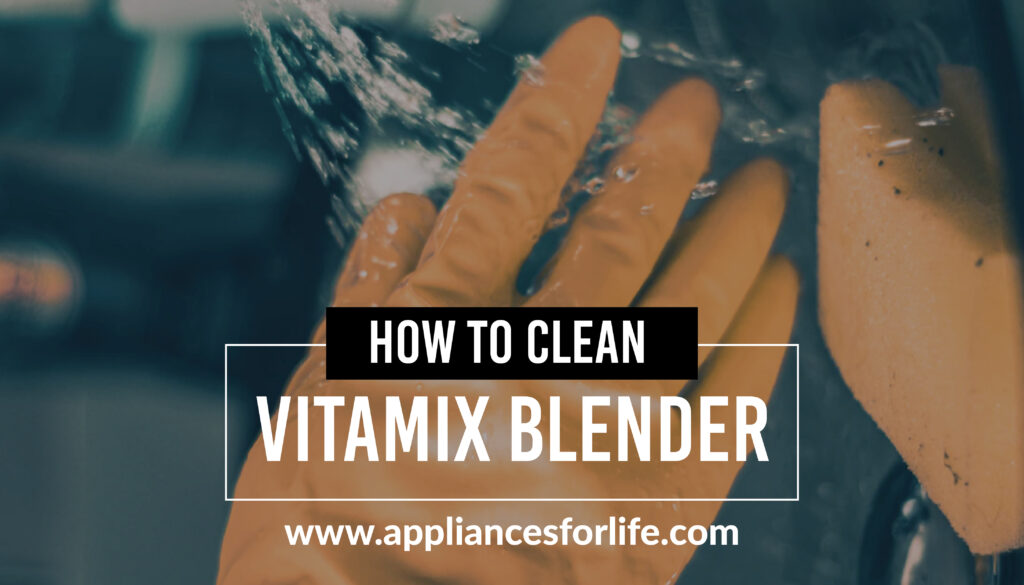
How to Clean your Vitamix Blender
Cleaning Vitamix blender is not a difficult task, this can even be done automatically, using the blender. Hence, if you have been wondering how to make your blender shine. Below are some of the tips to to help with cleaning your blender.
How to Clean a Yellowed Vitamix container
Your Vitamix blender containers can get cloudy as well as yellow. This occurs when your blender undergoes a lot of hot blends. Although it is rare to find yellow blender containers when you regularly blend Asian delicacies, there is a high chance that ingredients like Tumeric in soups and smoothies will still latch on the walls of your container, given it a specific color. This is why it is advisable to clean your blender regularly to avoid stains. Below is a step-by-step procedure to clean a yellowed Vitamix container.
STEP 1: RUN A REGULAR CLEANING
This action may not be followed if you have already rinsed your container out after use. However, if you have just used your blender, you must get those remnants out of the blender to allow easier or deeper cleaning.
STEP 2: EXPOSE THE CONTAINER TO SUNLIGHT
As you already guessed, this second step is very natural and practical. You need to expose the container to UV rays and leave sunlight to do its trick. This natural method of getting rid of stains will particularly remove turmeric stains. After this, you may not need to proceed to the next cleaning stage. However, if Tumeric stains are not completely gone, you may try the technique below.
STEP 3: PREPARE A WARM WATER, BLEACH SOLUTION
If exposing your blender container to sunlight does not trick, you can fill the container with warm water and add one or two tablespoons of liquid bleach. Leave this to rest for fifteen minutes, and then turn the solution out to wash the container with hot water and soap. This method should leave your blender spotless.
How to remove Peanut Butter stuck on your Vitamix?
Removing peanuts from any blender may not be the most interesting task to indulge in. This is so because peanut butter, as you know, maybe very sticky. This sticky nature is why it is necessary to exercise some patience while trying to get it off. The best way to get rid of peanut butter from your Vitamix blender container is by soaking it in hot water for long hours. Before you do this, however, ensure to remove a chunk of the butter from the container to make the process total ease.
After leaving the container soaked for a significantly long time, you may empty the container, disassemble the blades, and carefully bring them out. Scrub the blender blades carefully to eliminate any lurking food or butter particles. This is pertinent as failure to do it may allow bacteria to breed on the blades. Once you’ve cleaned the blades, it’s time to tackle the carafe. Wash the blender with hot soapy water with the same soft bottle and brush. Be thorough while doing this and airdry the blender parts separately when the washing is done.
How to give your Vitamix blender a deep clean
Use Magic Erasers
Magic erasers are known to contain the chemical formaldehyde-melamine-sodium bisulfite copolymer. If that is too much jargon for you, just imagine it as Sodium-Chloride. Some people believe that this chemical makes the use of Magic Erasers harmful, but these beliefs should be debunked, and it should be understood that the ingredients in Magic Erasers have been safely and commonly used for many years in a wide range of household products.
As the name suggests, this solution works like magic. A Magic Eraser can give you the extra help you need to clean your Vitamix machine. It gets rid of those stubborn stains in a blink. It’s much more effective than a soft pot scrubber and pretty easy to use.
Hand-Wash the Rubber Seal
Separate the rubber ring seal from other components of your Vitamix blender, soak them in hot water and soap for some minutes and scrub them with a brush to get rid of the gunk stuck on them.
After doing this, ensure to run a last overall cleaning, paying attention to the intricate parts you may have missed. Grab a damp cloth and wipe down the motor base to do this. Make sure to also wipe down the centering pad.
Then, with a paper towel, clean around the blade assembly parts. More often than not, these parts get dirty without us even noticing.
Getting rid of odor in Vitamix blender container
It is a fact that blending ingredients like Onion or Garlic in your blender may cause a lingering odor in your Vitamix container. The taste and smell of Onion or Garlic may be desirable on their own or in some delicacies, but when it infiltrates your green or smoothie, it becomes undesirable and repulsive. If your Vitamix container still smells funky, you can use the vinegar soak method to remove this repulsive smell.
- Sponge down the outside of the container. There’s usually some buildup there.
- Soak your container overnight in vinegar. Use a mixture of 2 parts hot water to 1 part white vinegar. In the morning, rinse.
- Run a cleaning cycle. The container is halfway filled with warm water plus a bit of soap.
This should eliminate odors in your Vitamix container and restore your Vitamix to its previous splendor.
FAQs
Will Vitamix replace my container if it’s cloudy or scratched?
Unfortunately, no. The Vitamix blender warranty does not cover cosmetic changes that include scratches on your Vitamix container wall. That being said, give Vitamix customer service a call. They may be able to replace your container as a one-time courtesy.
What makes a Vitamix machine so different from ordinary blenders?
Vitamix is different from other Home Appliance companies because they are dedicated to making only one household kitchen product – the Vitamix blender. Since 1937, their motors and patented designs for stainless steel blades and containers have been unmatched in quality performance and durability. These three key components, carefully designed to work together, set a Vitamix apart from all other blenders.
Can the Vitamix be used instead of a Juice Extractor?
Yes, Vitamix will effectively do the task of a juice extractor and even better in some cases. Apart from extracting the juice from fruits or whatnot, it also helps preserve the nutrients by retaining the vitamin-rich skin, seeds, pith, and pulp. A good fit ifor this task is the Vitamix E310 Explorian Blender, Professional-Grade. Blender users also wonder, if a blender can be used as a food processor. In a nutshell, the answer to this question will depend on the kind of food processing in question. But in most cases, the answer is yes. You may check this article on ‘if a blender can be used as a food processor’, for details
How long is the Electrical cord of a Vitamix blender?
From the back of the blender, the cord extends 15 inches.
Is it possible to clean Vitamix blender?
A Vitamix machine virtually cleans itself. Just put one or two drops of dish soap in the container, and fill it with one-third full of warm water. Secure the lid, run the machine at its highest speed for 15- 30 seconds, and rinse. Those are the Tips for cleaning blender .