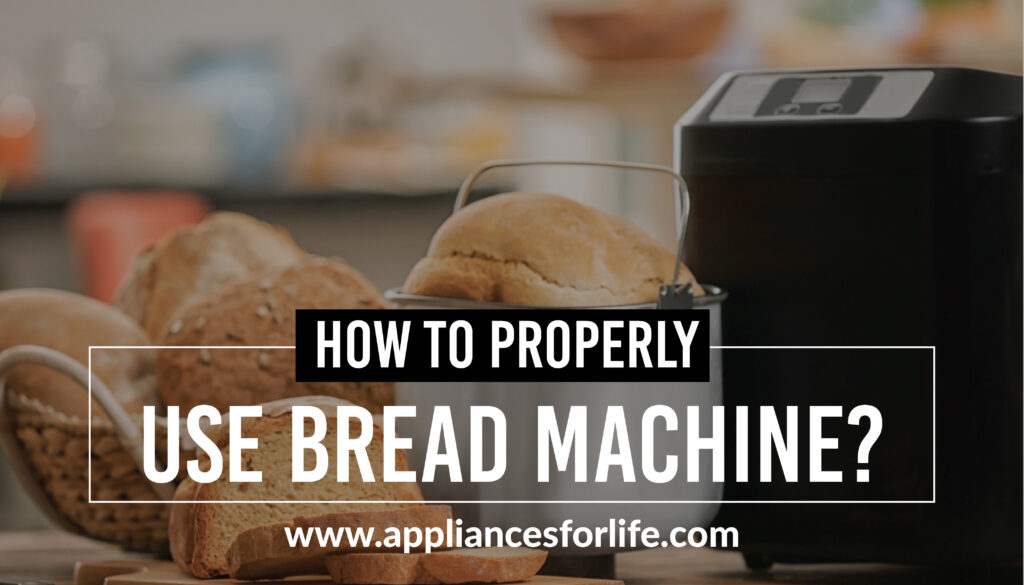
How to make bread using a bread maker
Bread makers are designed to be mostly automatic. All you need to do most times is toss in your ingredients and you get perfect results in a loaf of bread. However, it should never be ruled out, the fact that there are things to be done manually in order for our loaf of bread to come out the best it can. Hence, in the process of making bread, there are some things to watch out for and in fact learn, to get great results.
Whether you have recently acquired a bread maker or you are looking to achieve better results with your bread maker, in this guide, we’ll show you how to use a bread maker to get the perfect bread.
Use the right flour
Strong bread flour can go a long way to determine the quality of your loaf. Strong flour is that, which contains a sizable chunk of gluten and gluten helps your bread rise. Hence, it is partially safe to conclude that your flour is a strong one when it makes your dough rise.
Use Yeast Designed For Bread Machines
The place of yeast is inevitable in making a beautiful loaf. Through a fermentation process, yeast produces the carbon dioxide necessary to make bread rise. Without yeast in bread flour, it may not rise as it should. For bread machines, dried yeast, which does not require pre-fermentation is most suitable. The other kind is also not a terrible choice but the compatibility of dried yeast with bread machines is uncanny. Usually, it is indicated on the yeast package whether or not a particular yeast is a breadmaker compatible, therefore you do not need to worry about getting a perfect yeast fit for your bread maker. Dried active yeast can be used, but it should be dissolved in water before using it in a breadmaker.
How you identify dried yeast is, that they are usually sold in sachets or small tins. It is important that you seal it appropriately after every use and store it up in a refrigerator after use. Some machines come with automatic yeast dispensers, while others require you to place the yeast in the baking pan. In the latter case, it’s best to add yeast first or last, so that flour prevents it from coming into contact with the liquid too soon. If this were to happen, your loaf might not rise enough. This is particularly important when a delay timer is used.
Use room-temperature ingredients for most recipes
It is best practice to keep all your bread ingredients at a relatively warm temperature unless otherwise specified in the recipe. While you do this, however, avoid subjecting your yeast to a hot temperature- this will kill it and your dough may not rise. While there’s also a general warning about adding fridge-temperature liquids – your bread may not rise as well – it’s best to err on the side of coolness rather than attempt to heat any refrigerated ingredients, such as dairy.
Machine Basics
To a large extent, the bread you produce depends on the bread maker you use hence, there are some basic precautions to take while using your bread maker. This is important if you must get the best results.
Avoid spilling anything inside the breadmaker, I find it easiest to place the pan on the scales and weigh the ingredients that way. But make sure your kneading blade is in place beforehand. Getting it in there once you’ve added the flour is messy at best; at worst you’ll be coming back to a bread that hadn’t mixed or baked properly – which is disappointing.
Also, do not forget to remove the bread from the pan as soon as the baking is completed. Otherwise, the bread can turn soggy and even collapse due to excess moisture. Furthermore, Kneading blades can sometimes become stuck in the loaf – make sure to cut it out carefully before slicing
Bread Maker Programs
Naturally, bread makers have a selection of programs that come with pre-set baking times, although, you may choose to customize some of these settings to what you consider suitable. In most cases, it is important to stick with a program unless you have noticed that, that specific program leaves your loaves not loaves improperly done
The specific setting to use depends on your recipe. Usually, there are programs for white, wholewheat, gluten-free, and “quick” or “rapid” bread at the very least. The ‘quick’ setting may help to significantly reduce baking time but the downside to this is that the dough will also have less time to rise, forcing you to add more yeast. Excessive yeast is not really good for health.
Most breadmakers have a setting called “bake-only” or “cake”, which doesn’t involve kneading or proving. You’d normally also find a program that anticipates the addition of dried fruit, nuts, or other small chunks. Some breadmakers beep to let you know when to add these other ingredients – others have an automatic dispenser. Whatever program you choose, understand how it is to be used by reading through the product manual.
More than the Loaves
A bread maker may not be able to make large foods like pizza or bread rolls. This is because it is inherently designed to make a loaf of bread and the size of this loa is limited to the size of the bread maker pan. However, your bread maker, even in this situation is not completely useless because it can at least help with the mixing of ingredients and even prove the dough for you. Once this is done, you can remove the dough and then use it how you want, say creating a pizza or cutting the dough up into roll-size chunks and cooking them in the oven. Using this technique also allows you to create more rustic-looking loaves, shaped by hand before putting the bread into the oven.
After making dough in a bread maker, you really do not need to hastily use it for your pizza or bread rolls. It can be refrigerated in an airtight container for up to 24 hours. Regardless of this cold temperature, the dough will rise. Hence you do not need to worry about that. But when finally remove it from the refrigerator, punch it down, to let out stored air.
While the majority of dough recipes are suitable to be made in the machine, it’s advisable to adhere to the minimum amounts of flour recommended as per your manufacturer’s instructions. If you’re using very few ingredients, they may not get mixed and kneaded properly in a large baking pan. Here’s a selection of dough recipes you can make in a breadmaker.
Tips for using a Bread Maker
Tip 1: Most times, we think when we interfere with the bread in the process of baking or even mixing, we ruin it. But honestly, this is not the case. Nothing bad will happen to your bread if you sneak a peek while it is being processed.
Start watching the dough about 10 minutes into its kneading cycle; it shouldn’t be vicious and liquid-like (top), nor dry, stiff, and “gnarly” (bottom). As a blogger, Susan Reid says, “If you touch the dough and your finger comes back coated, the dough is too wet. If you touch the dough and it feels like poking a beach ball, it’s too dry.” The dough should have formed a cohesive unit and, if not “smooth as a baby’s bottom” yet, should be headed in that direction. If it’s not, add more flour (if it’s too soft), or water (if it’s dry).
Tip 2: Wipe excess dough off your bucket
When your bread machine is done kneading], make sure to wipe the excess mixed flour, off the surface of the bucket. It is important to do this as it helps prevent floury spots on the crust of your bread.
Tip 3: Take the Paddles out of the bucket before the loaf bakes.
Just before the final rise, it is necessary to get the paddles out of the bread maker’s bucket. The timing for this can be a bit tricky but once you figure it out, you are good to go forever. To get your timing right, get out your kitchen timer and put it in stopwatch mode. Start your timer when you press “Start” on your bread machine (even if your machine has a “rest” or “preheat” mode right at the beginning); you’re simply trying to gauge the amount of time between when you press start, and when the final rise begins.
So, as soon as your bread starts its final rise, you will hear the machine start up momentarily, it’ll be knocking down the dough, which means the final rise is about to go down. When that happens, stop your timer and check the time, that way, you will have figured out the appropriate time to get your paddles out of the bucket. This procedure is really advisable, to prevent big rips and holes in the bottom of your loaf.
How a Bread Machine Works
Understanding how a bread maker works is important to utilize all its functions and to further produce tasty and delicious loaves. The stages explained below show how a bread maker works.
The preheat Stage: In this stage, the ingredients warm up slightly. This happens for ingredients like the yeast to rise the way they should.
The Knead Stage: A bread maker starts kneading really slowly by distributing the yeast applied to your flour. It further moistens the gluten in the flour, then the kneading paddle gets to work to form the dough ball. It does this by turning the flour slowly, then faster and faster.
The Rise: This is the time for a short wait. Here, the dough ball is left to expand and it so expands till it completely fills the bread and eventually takes the shape of the pan. The kneading paddle still works in this stage but only slowly and for a few seconds. This stage is also known as the ‘punch down’ and it is necessary for the release of trapped carbon dioxide
The Baking: Here is where baking occurs. As soon as the baking is done, the bread maker keeps warm for a while- as long as 60 minutes. However, it is important to get your bread off the pan, otherwise, it may become really soggy.
Note that, even while your baking is on, you can still add some ingredients. For ingredients like nuts, fruits, chocolate chips, or seeds, the machine beeps to indicate that a new addition has been made. When this whole process is eventually done, you can then unplug the bread maker and remove the bread from the pan, let it cool on a rack for 30 minutes and fill your kitchen with the smell of homemade bread, and that’s it.
Two of the Best Bread Makers
These two bread makers will make you realize why bread makers are worth buying, try them out!
This bread maker weighs about 1 pound and it has a sturdy build, finished with stainless steel. It utilizes 110 volts for effective bread making. This quality bread-making technology produces a superior crust color and texture. It has 12 whooping pre-programmed menu options. It is also fully automatic and quite easy to use. Because of its stainless steel finish, it is also quite easy to clean, at least on its exterior. This bread maker has 3 crust shades light, medium, and dark and it bakes up to 2 pounds of loaf. Its lid has a viewing window that allows you to monitor its bread-making process. Finally, interior light to check the bread as it bakes
This loaf maker is the best of the best. It comes with an ultra-thick manual that’s chock-full of amazing and unique recipes, from crusty olive and roasted garlic bread to honey whole wheat cinnamon raisin. It has a beautiful brushed stainless steel finish. It weighs quite a number through-16.85 Pounds. It measures approximately 9.8 inches in length, 15.7 inches in Width, and 13.9 inches in height. It may interest you to know that its automatic fruit and nut dispenser releases ingredients at the right moment during the knead phase so they are evenly incorporated within the dough. This Breville bread maker also has a Unique collapsible kneading paddle that thoroughly mixes ingredients and then collapses before the bake phase to minimize the hole at the base of the baked loaf and a smart LCD display screen for progress indication.
FAQs
How Do I Clean My Bread Machine?
One of the great benefits of investing in a bread machine is its ease of use–It is pretty easy to clean up. First of all, most models come with a nonstick finish. Hence, for most loaf makers, a quick wipe with a damp cloth should be sufficient to remove any residue. If some stubborn stuff remains, try scrubbing with a soft-bristled brush. Anything rougher could damage the nonstick coating. For the exterior, just wipe with a soft cloth. It may interest you also to know that, most bread machines are dishwasher safe.